How to Enlarge Classroom Decor When Printing
Share this Post
One of the most frequent questions I get is about how to print classroom decor larger or smaller. With the wide variety in bulletin board sizes, one size doesn’t fit all! So you might need to either shrink or enlarge items to better fit your classroom. And Adobe Reader makes it easy to do so! I’m going to go step-by-step through how to shrink and enlarge classroom decor when printing in this post. I’ll also cover how to print multiple items on one sheet if you’re trying to save paper and want your decor a smaller size. You’ll be a decor printing pro in no time!
Disclaimer: This page contains affiliate links, meaning, at no additional cost to you, I will earn a small commission if you click through and make a purchase.
Step 1: Use Adobe Reader
All of my decor items are formatted as PDF files. So you want to use Adobe Reader to print out your items. Before you even start printing, download the latest version of Adobe Reader for free. 90% of printing issues are fixed by updating your Adobe Reader version!
Next, open the Adobe Reader application on your computer. From within Adobe Reader, select “File” then “Open” and select the classroom decor file you want to view from the list. This ensures you’re opening the file in Adobe Reader rather than another default program on your computer.
Step 2: Enlarging Classroom Decor When Printing
You can shrink or enlarge items using percentages in Adobe Reader. Use over 100% to enlarge items, and under 100% to shrink them. And you can do it all using standard size (8.5″ by 11″) paper! You don’t need a special printer or unique paper size to do it!
First we’ll cover enlarging prints. With the PDF file open in Adobe Reader, select “File” then “Print.” From within the print settings pop-up, select “Poster.” Next, enter the page number of the item you want to enlarge. Then enter the percentage you want to enlarge the item by.
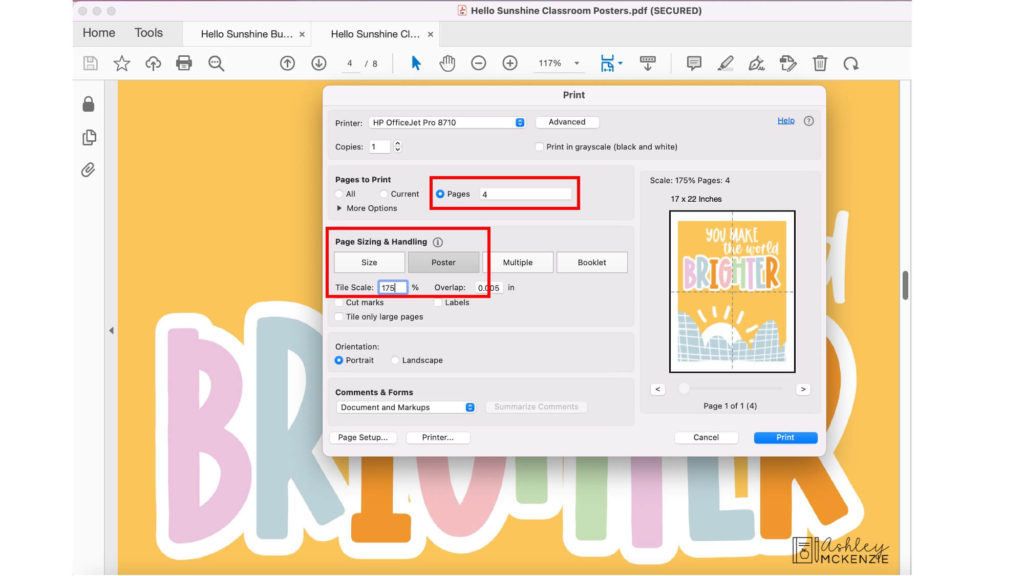
In this example, we’re enlarging one of the Hello Sunshine Classroom Posters. The poster I want to enlarge is on page 4 of the PDF file, and I’m scaling it up by 175%. When you print a page over 100% scale, it prints the image out over multiple pages. In the print preview (on the right side of the printing window), it shows how many pages it will use to print the image. The dotted lines show where the page breaks are. In this example, the poster will print out over 4 pages.
Once printed, you’ll assemble your pages to create the full image. You’ll need a glue stick, washi tape, and scissors. Cut along the outside edges and one of the inside edges of each page. You can use scissors or a paper cutter for this. Leave white space on one side of each page to have something to glue the other side to. Once glued, tape the backside with washi tape to secure it. The glue alone won’t hold it completely.
After assembling your multi-page printout, you can laminate it (if you want to) and then choose where to place it on your bulletin board. To laminate items you’ve enlarged, you’ll need to use a large scale laminator. Most printing shops (like Staples or Office Depot) have these, and a lot of school work rooms do too. My recommendation is to laminate items that are in high touch areas or items you want to reuse for a long time. If it’s something seasonal that you only plan on using for a short period, it’s probably not worth the trouble to laminate it. But it’s up to you!
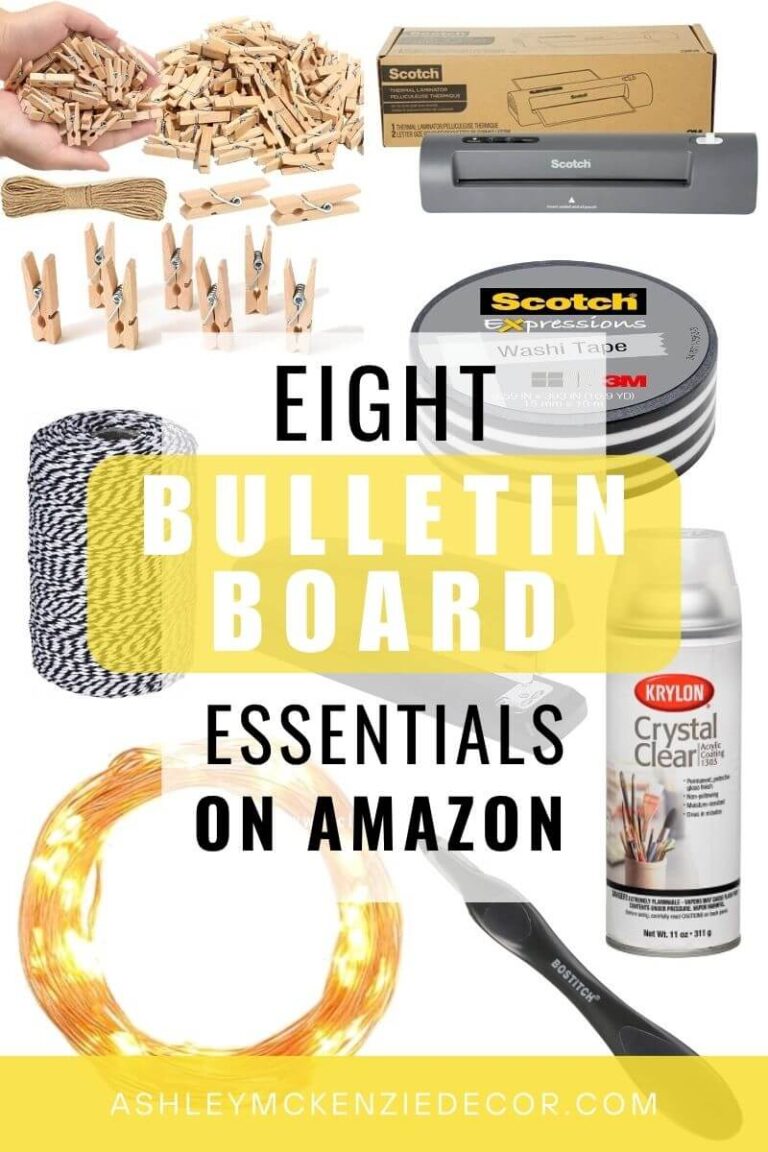
Next, I like to use washi tape to attach my decor to my bulletin board while I decide exactly where I want everything. This makes it easier to move things around while I’m deciding how I want my display to look. Then I staple it once I know right where I want it to be!
Step 3: Shrinking Classroom Decor Items
All of my classroom decor items are designed to print on 8.5″ by 11″ paper, except for the classroom calendar background. (For that, check out these tips for printing the classroom calendar.) If you want your posters or another decor item to be smaller than standard paper size, you’ll scale down during printing. Again, you’ll need to use Adobe Reader. Refer to Step 1 in this post to open your file in Adobe Reader.
In the print settings window, choose which pages you’re printing. Then check the box for “Custom Scale.” Next, enter the percent you want it to print as. In the example below, we’re printing one of the classroom posters at 60%. You can see in the print preview (on the right side) how much of the page the print is going to take up.
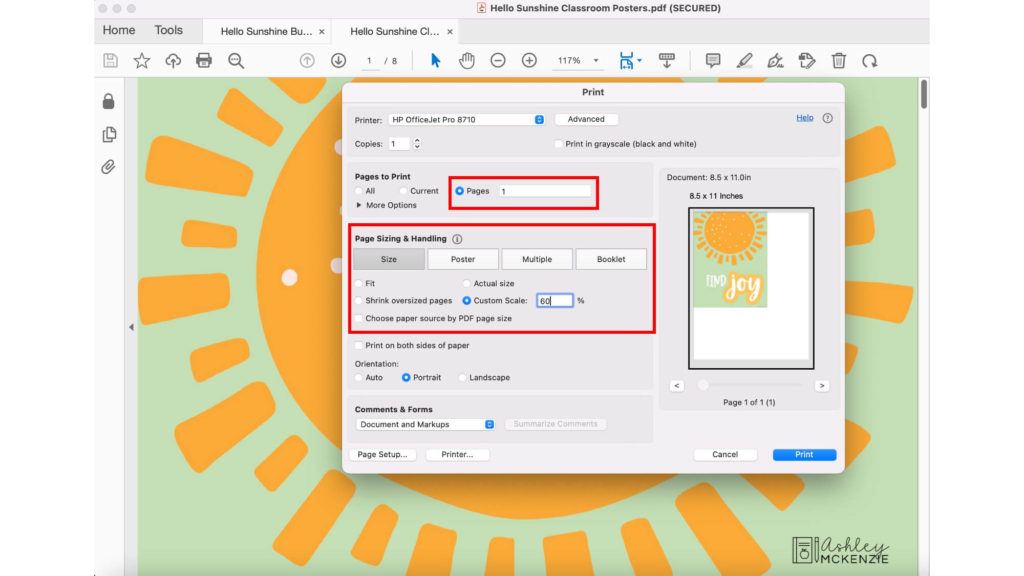
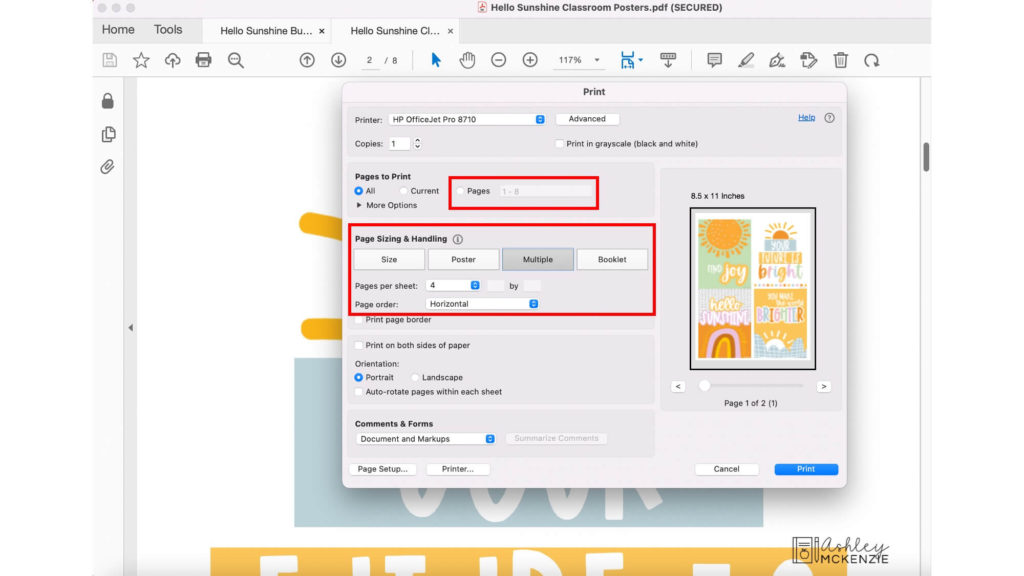
You can also print multiple pages on one sheet to save paper! In the print settings window, select the option for “Multiple” and choose how many you want to print per page. You have lots of options with this to print multiple items per page.
Shrink or Enlarge Classroom Decor When Printing
As a rule, you want to fill the space on your bulletin board without making it look too cluttered. My advice is to print a few test pages first. Then hold them up to your board to see if they’re the right size before you print everything. It might take a couple of test prints before you get the scale just right for your board, but it’s worth doing!
My bulletin board is on the smaller size; it’s 3′ by 4′. So, I typically print the letters and banners at a smaller scale (around 80%). And I often end up enlarging some of the decor images to better fill the space on my board. In many of my bulletin board kits, I include a printing scale recommendation on some of the decor items I enlarged so you have an idea of where to start when you’re printing. With so many different sizes of bulletin boards out there, this method of shrinking/enlarging pages allows you to use the same decor kits on a variety of bulletin board sizes!
More Printing Tips and Recommendations
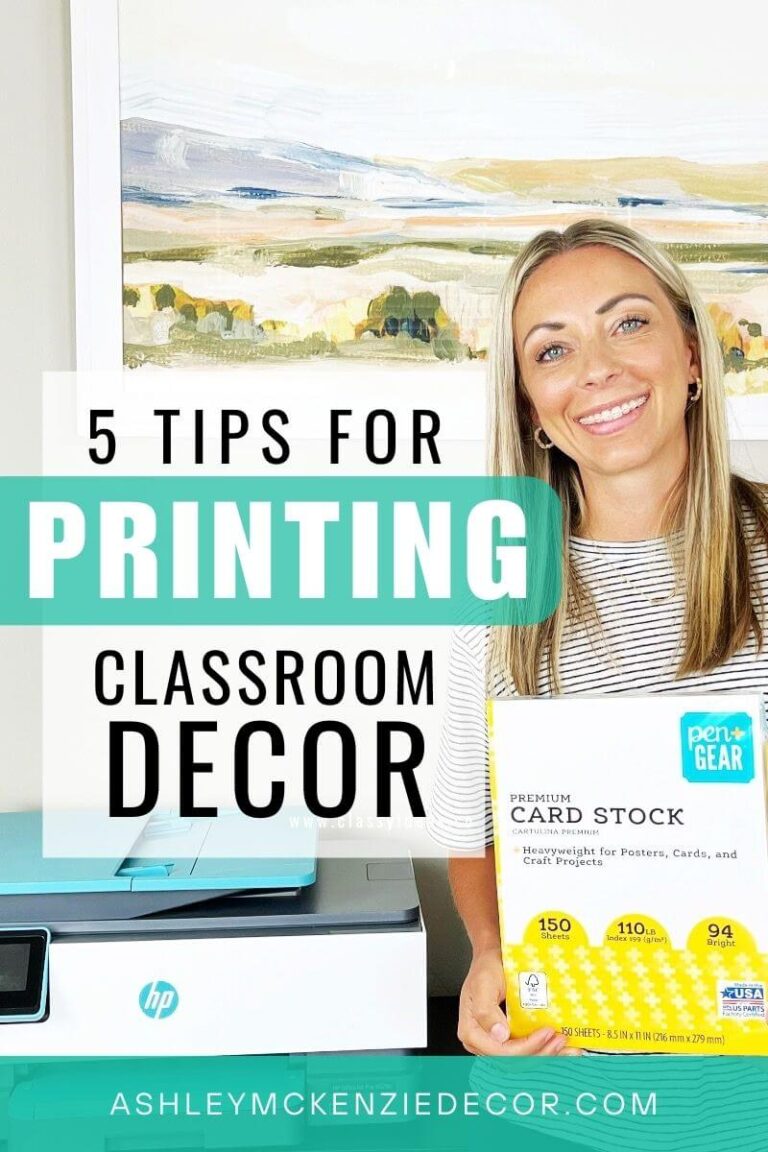
For some, printing classroom decor feels like a daunting task. But it doesn’t have to be! Now you know how to shrink or enlarge classroom decor during printing. Also be sure to check out these 5 tips for printing classroom decor for more ideas, including paper and printer recommendations. And remember to check your ink levels before printing. You want your classroom decor to be bright and streak-free, so it’s definitely worth the effort to make sure you have plenty of ink before you start a print job. Happy printing!

