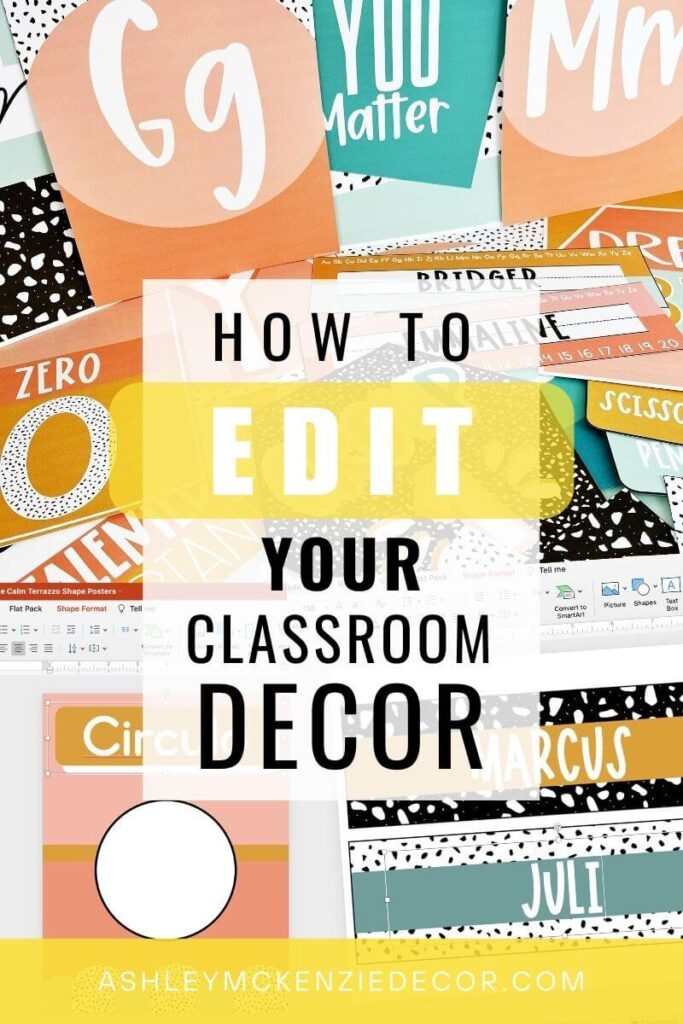
How to Edit Your Classroom Decor
Share this Post
Does your school require that a specific font is used on your alphabet posters? Or perhaps you’re teaching in a bilingual classroom and you want to display the days of the week in multiple languages? Maybe you have a unique class motto that you’d like to add to your classroom posters? Whatever the reason, it’s super helpful to know how to edit your classroom decor. So let’s look at my favorite decor editing tips to make you a pro!
Tip 1: Access to Microsoft PowerPoint is a MUST
Most editable classroom decor resources you purchase digitally are included as a PowerPoint file. This is true of all of my editable items. So the best way to edit them is by using Microsoft PowerPoint. If you’re on a Mac, you can also open PowerPoint files in Keynote. But I recommend using PowerPoint if possible.
Tip 2: Add text boxes when you edit your classroom decor
For file security and Terms of Use purposes, generally the background of each slide is flattened. This means it can’t be changed. But you can add any layers you want on top of the background, including extra text boxes. Add these anywhere you want your text to appear on the slides!
If you’re using decor from my shop, you’ll just want to look for any of the files that begin with the word “Editable” in the title. These are always a PowerPoint file that’s set up perfectly for you to add your own text on any of the slides. Start by opening the file you want to edit in PowerPoint. In my resources, there are usually text boxes already added to each slide. However, you can always add more! Or move them wherever you want them to be.
To add a new text box in PowerPoint, first go to the “Insert” tab, then select “Text Box” from the menu along the top of the screen.

Next, click and drag your mouse anywhere on the slide to create the text box. It doesn’t matter how big you make it initially because you can always resize it later if needed. And it automatically resizes itself once you begin adding text. You can also move the text box wherever you want it to be on the screen by clicking and dragging the text box.
Then, add your text!
Tip 3: Font choices
You can always use any font you already have on your computer. But if you want to match the look of the original decor, you’ll likely need to purchase a custom font from the font creator. Most of my decor packs include links to where you can find the main fonts used in that theme. But if you’re looking for a specific font and can’t find the link, just message me on TPT (in the Q&A) or on Etsy!
And no matter the font you choose, you can have lots of fun layering text boxes to create a “bubbly” letters look. I use this technique in tons of my designs because I love the way it makes the words pop!
Tip 4: Font colors
Here’s an expert tip to take your editable decor to the next level! You can make your font color match the designs on the slide PERFECTLY if you want to use more than just black or white text. Take this Camping Adventure themed classroom poster set. Let’s say I want my text (where it currently says “Your Text Here”) to match the same green color found in the stripe that cuts across the page.
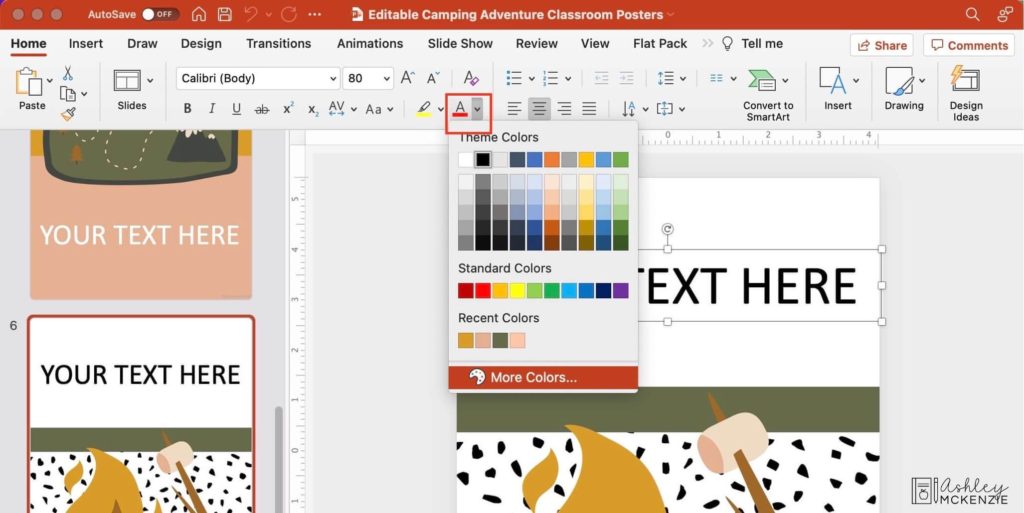
First, select the text box by clicking on it. Then, in the “Home” tab, click on the down arrow next to “Font Colors” (this is the underlined “A” shown in red below). Select “More Colors…” at the bottom of the pop-up window.
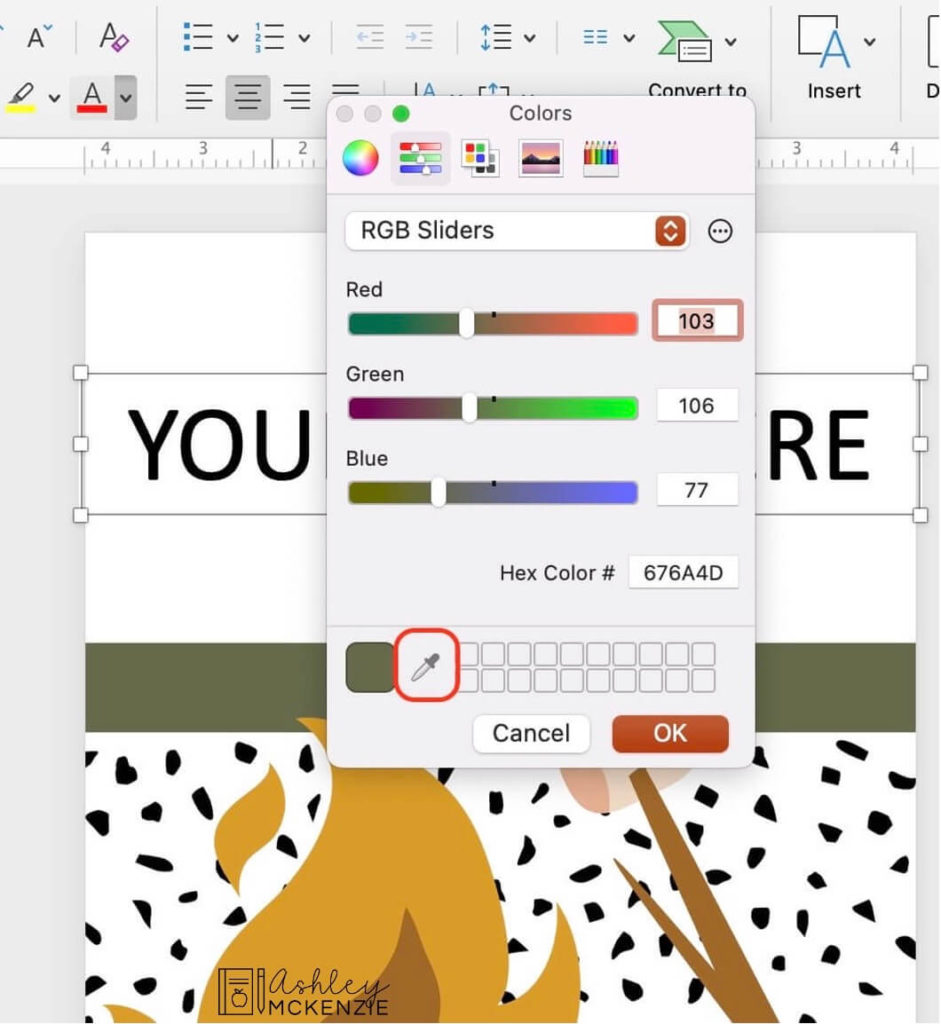
In the next pop-up, select the eyedropper tool. Use it to “grab” color from anywhere on the page. Using the mouse, hover over the color you want, then click to “grab” it. You’ll see it appear in the color swatch next to the eyedropper. Once you have the color you want, select OK.
This trick is really fun to make your font match the colors within the resource you’re editing. Give it a try next time you’re making name tags or schedule cards!
Tip 5: Copying slides
Let’s say you’re making desk name tags for your class and you need more slides of a particular design to create a tag for each of your students’ names. To create multiples of a slide, find the slide you want to copy in the thumbnail pane on the left. Then right-click on the slide thumbnail and select “Duplicate Slide.” (On a Mac, tap the track pad with two fingers while your mouse is on the slide you want to copy to make this menu appear.)
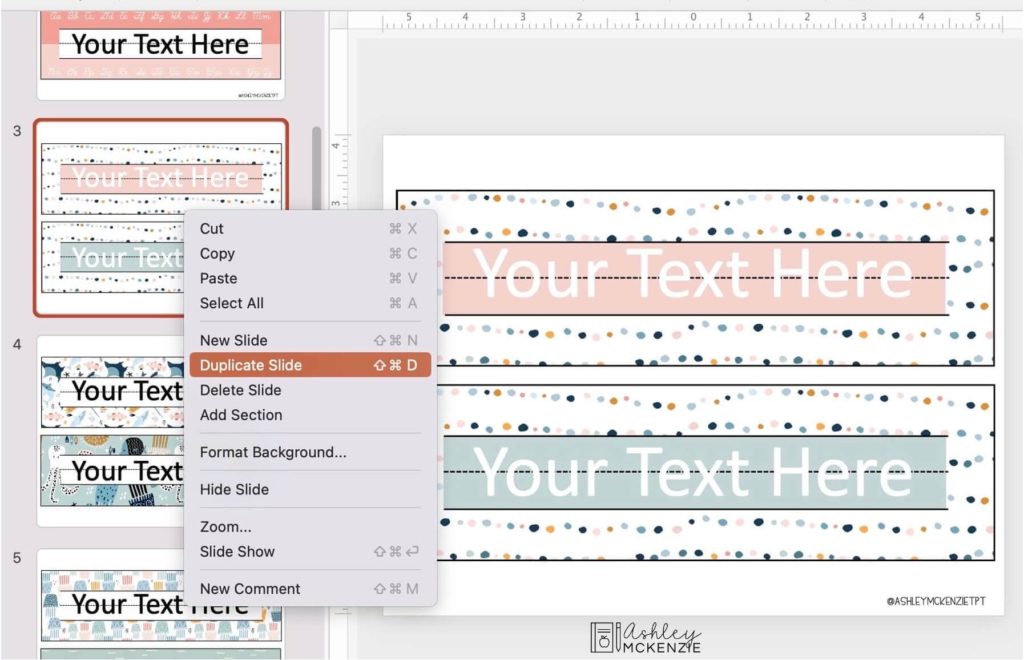
Simply copying and pasting slides doesn’t work because the flattened background image won’t carry over that way. Make sure you’re choosing to “Duplicate” the slide instead to keep the original design in tact. You can use this duplicating tip to make as many copies as you need of any slide!
Edit your classroom decor, then PRINT!
After you’ve finished editing your decor, it’s time to print! Be sure to check out my top 5 classroom decor printing tips, covering everything from what paper to use to best laminating practices. And if you’re printing a classroom calendar, you’ll want to read these special classroom calendar printing recommendations to make your oversized calendar a show-stopper!
I hope these tips will help you easily edit your classroom decor like a pro! I’d love to see what you make with any of the editable resources in my decor themes. Please tag me in your photos on Instagram @ashleymckenzietpt. Happy editing!


