How to Make Text Glow in PowerPoint
Share this Post
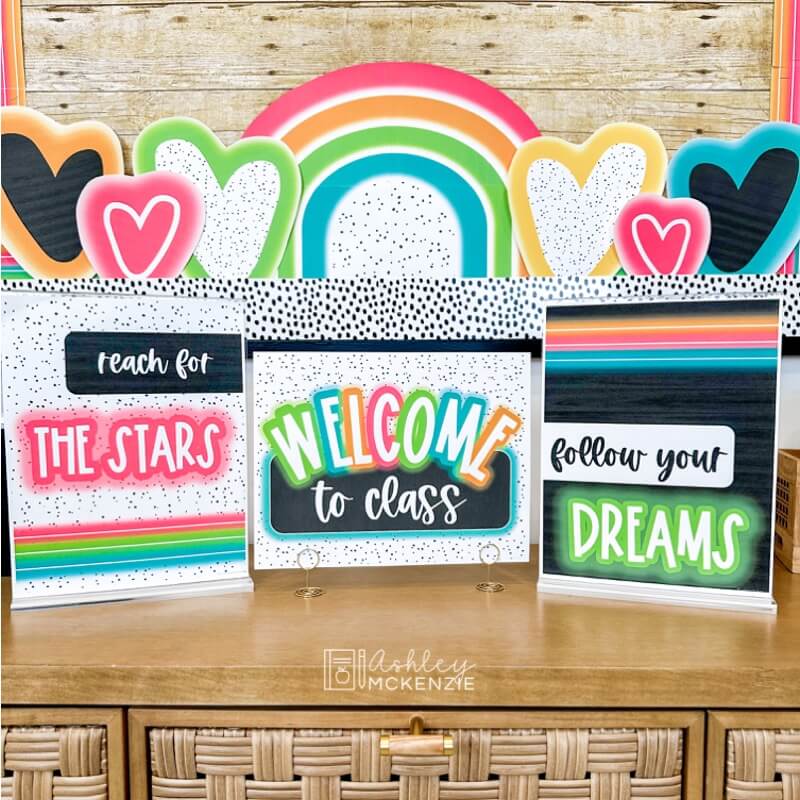
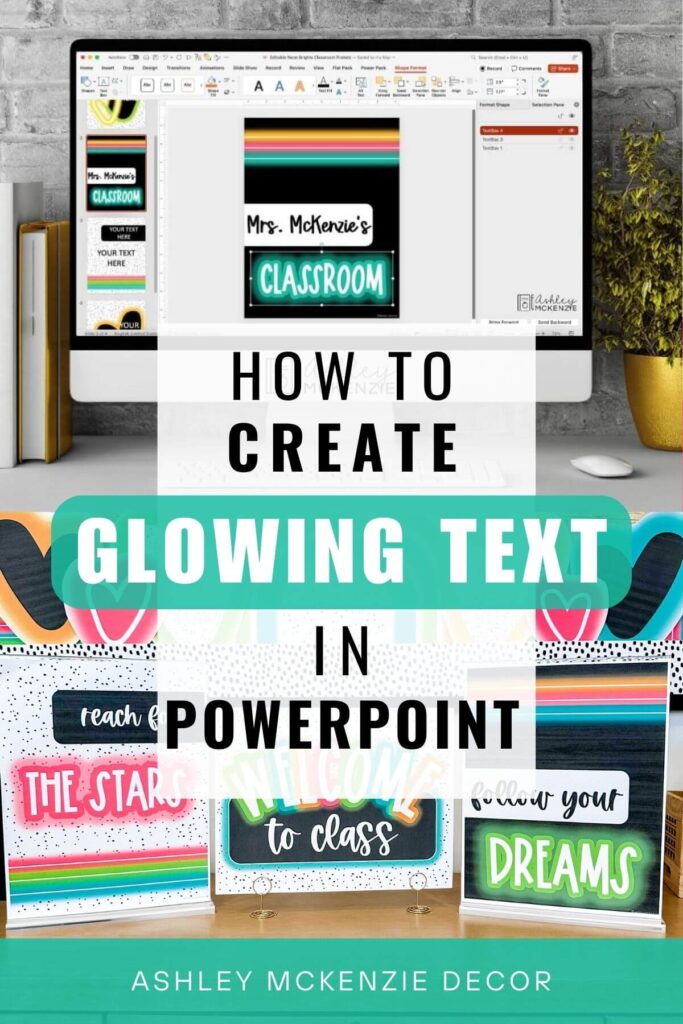
If you’ve spent much time working in PowerPoint, you’ve probably realized there are a million and one tools available. It’s incredible! So I love experimenting with the many different options while designing classroom decor. In one of my latest bundles, Neon Brights Classroom Decor, you’ll notice text that glows in those designs. I wanted it to resemble the look of neon lights, and the effect is perfect! In this post, I’m showing you how to make text glow in PowerPoint and achieve this same look!
Steps to Make Text Glow in PowerPoint
This glowing text look might not go with every design, but it is versatile enough to use in tons of scenarios! You can adjust the width of the glow and the color, making it easy to customize depending on how you want your finished product to look.
The steps below show how to do this. There are a couple different ways I used the glow feature in my Neon Brights Classroom Decor Bundle. The first is a glow directly around a single layer of text (shown in first image below). The second is using a text layering technique first, and adding the glow around the bottom layer for an even bolder look (shown in the posters image below). We’ll walk through the steps for each of these techniques below.
Add a Glow to a Single Layer of Text
Step 1: Open Your Resource in PowerPoint
All of the editable classroom decor files in my classroom decor bundles are in PowerPoint format. Which is generally compatible with Keynote (on Mac computers) as well as Google Slides for simple text changes. However, the steps I’m sharing for this technique are specific to PowerPoint. So you’ll want to make sure you have access to PowerPoint on your computer.
First, open the resource you want to edit using PowerPoint. In this example, I’m going to add a custom schedule card using the text editable file included in my decor bundle. But remember that you can use this same technique with any of the editable files you want to customize! If you’re using one of my classroom decor bundles, just look for the files that begin with “Editable” in the file name. They are all PowerPoint files, and you’ll use these files to add your own text on top of the original designs!
Step 2: Add Your Text and Choose Your Font
Next, add your text to the slide. There will likely already be at least one text box on the slide (with “Your text here” written in it). But if there isn’t, you can always insert a new text box if needed. Type the saying or word(s) you want to add to the slide. Then change your font as desired.
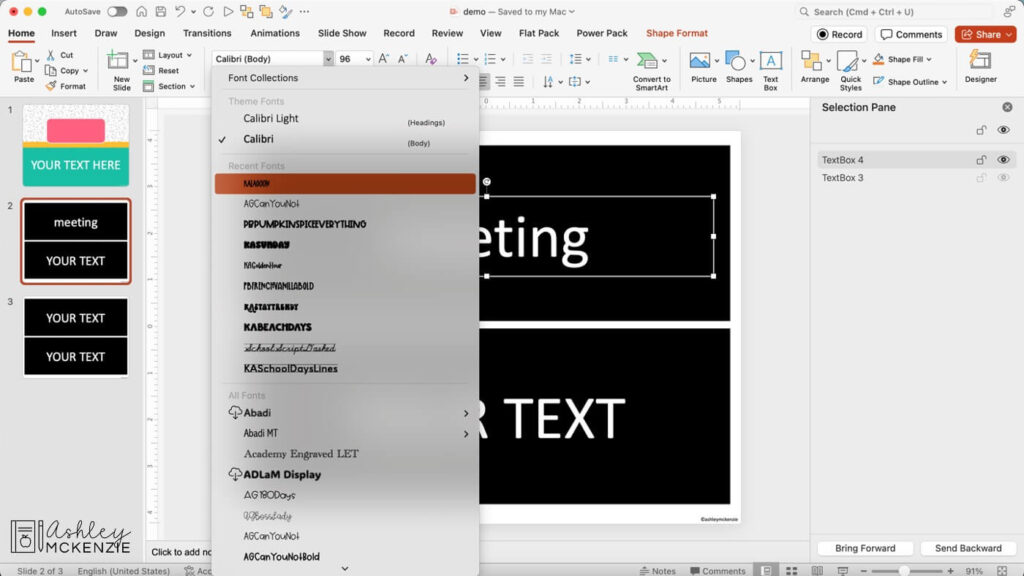
Step 3: Find the “Text Options” Tab
Next, open the Format Pane by first selecting the text box that you just added your text to. Then select “Shape Format” from the menu bar along the top of the screen. Next select “Format Pane” found on the right hand side of the Shape Format menu. Then select the “Text Options” tab.
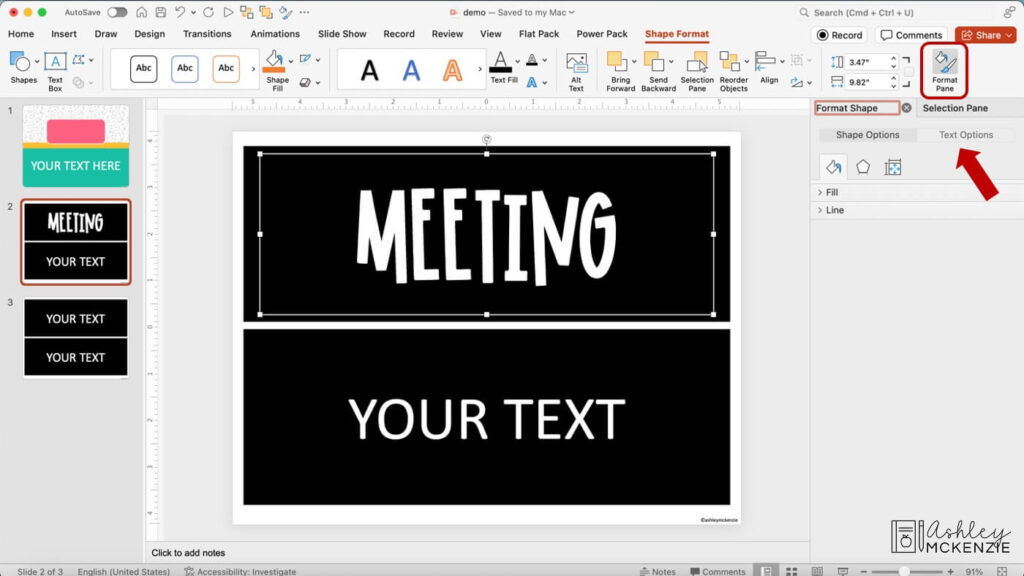
Step 4: Add the Text Glow!
Finally we’ll add the glow! From the “Text Options” tab, select the middle “A,” which has an outline. New menu options will appear. Select “Glow” to expand the glow settings. Choose the color you’d like the glow to be. You can use the eye dropper tool for this to match the color to the designs! (See step 4 in the linked blog post for tips on using the eye dropper tool.)
Next, adjust the size and transparency settings. In the example below, I used the following settings: Size = 22 pt; Transparency = 9%. But you can try different values to achieve a different look!
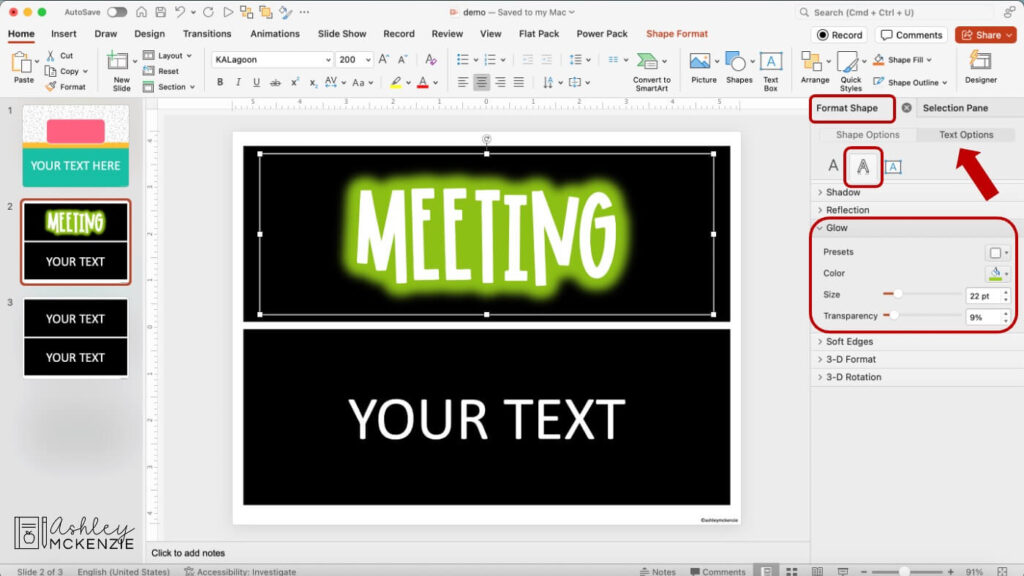
Extra Bold Text with a Glow on the Bottom Layer
Next, let’s look at the steps for the second option. In this technique, we’ll layer two text boxes on top of each other and add the glow to the bottom layer (shown in the welcome sign below). I used this same style in the Neon Brights Classroom Posters. Text really pops when it’s done this way!
Quick tip: You can grab these Neon Brights Welcome Signs for FREE!
Step A: Open Your Resource in PowerPoint
Follow steps 1 and 2 above to open the text editable file in PowerPoint. Then add your text and desired font(s). In this example, I’m going to customize the text in the editable Neon Brights Classroom Posters file.
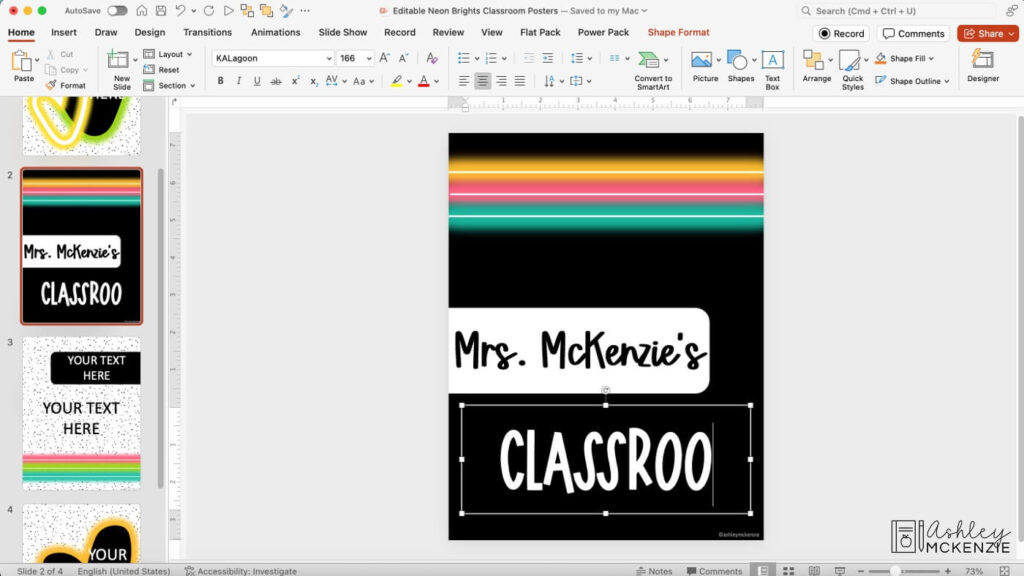
Step B: Layer Two Text Boxes
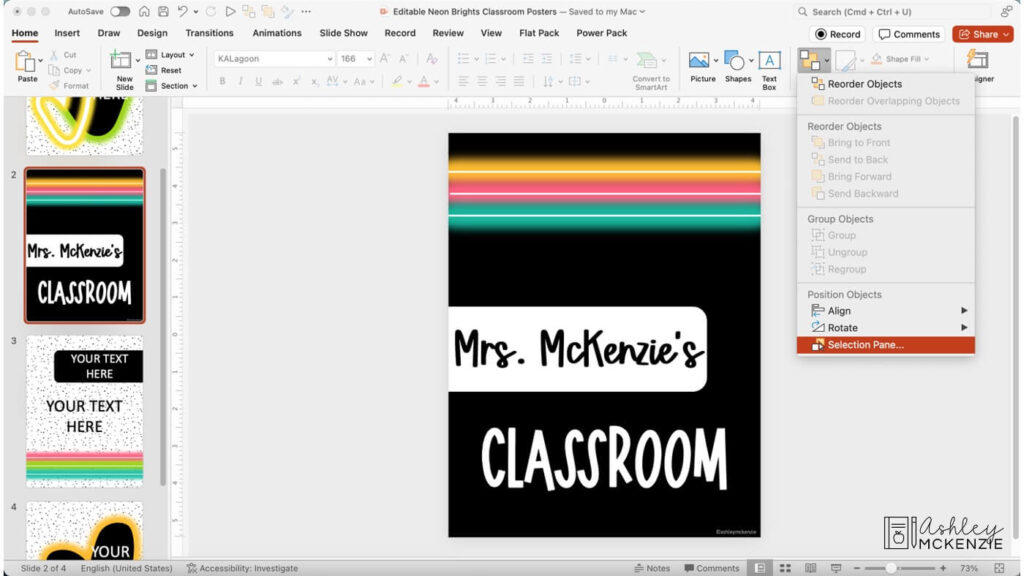
The next step is to layer two of the same text boxes – specifically for the text that will have the glow. My tip is to view the “Selection Pane” at this step. This tool allows you to see exactly which layer you have selected and makes it much easier to edit what you want to. In the “Home” tab (along the top of the screen), select “Arrange” on the right side, then click on “Selection Pane” in the dropdown menu.
From the “Selection Pane” on the right, select the text box you just edited in Step A. Then copy/paste to duplicate it. On a Mac, you can use the shortcut keys Command + c to copy, and Command + v to paste. On a PC, use Ctrl + c to copy and Ctrl + v to paste.
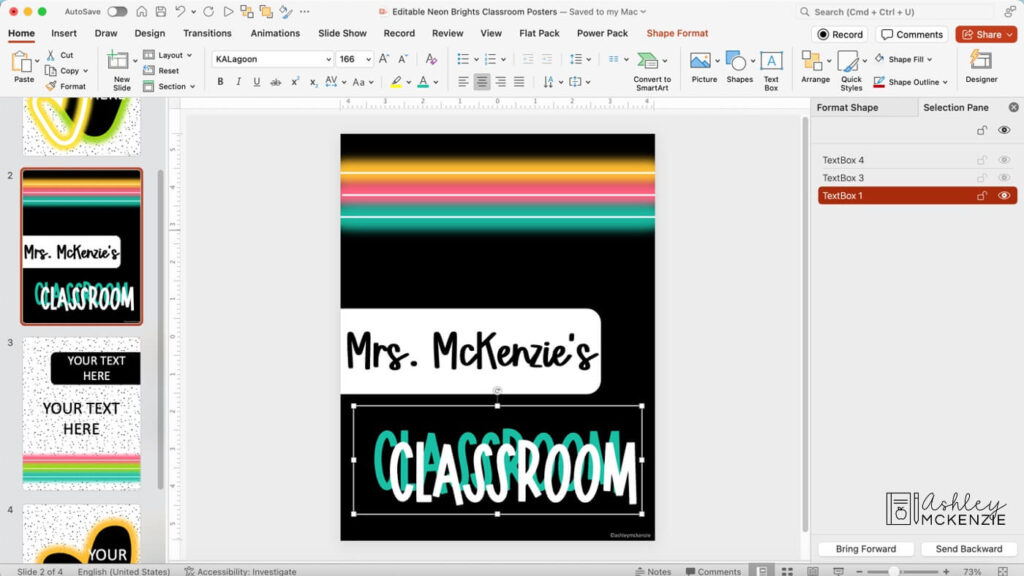
You don’t need to worry about lining up the text boxes just yet, but you can stack them if you’d like to. You can also change the color of your text in at least one of the text boxes to be able to distinguish one from the other more easily. Simply click on the desired text box layer from the “Selection Pane” on the right to make your text color change. In my example, I’ve changed the color of the bottom layer text box to teal. And I’ve left the top text layer white.
Step C: View Text Options
With the bottom text layer selected, view the Format Pane. Click on the “Shape Format” tab along the top menu, then “Format Pane” from the right side. Next, select the “Text Options” tab.
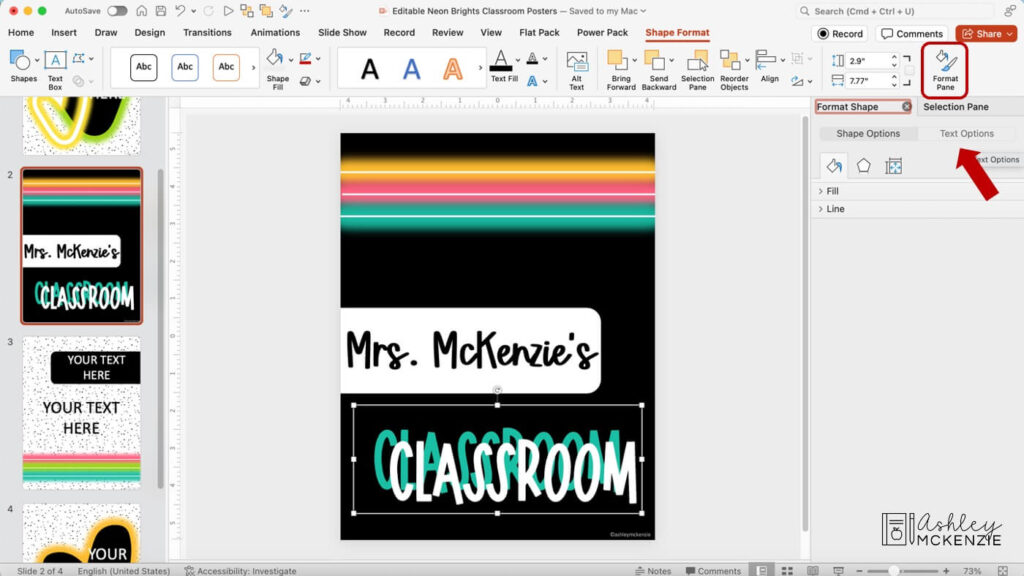
Next, in my example I hid the top text layer (the white layer) to make it easier to see what’s happening in the screenshots. You can do this from the “Selection Pane” by clicking on the little eye icon next to the layer you want to hide. Then you can unhide it when you’re finished making your edits to view it again.
Step D: Add a Thick Text Outline
Make sure the bottom text layer is currently selected (you can double check this from the Selection Pane). Then go back to the Format Shape pane, and the Text Options tab. Expand the “Text Fill” options, and verify that you have the correct solid fill color selected. You can change it now if desired, even using the eye dropper tool as mentioned previously in the post.
Next, expand the “Text Outline” settings (as shown below). Change the color to match the color you used in the text fill section above. Then adjust the width of the outline; I used 30 pt in most of these designs. But you can try changing these settings to see how it changes the look!
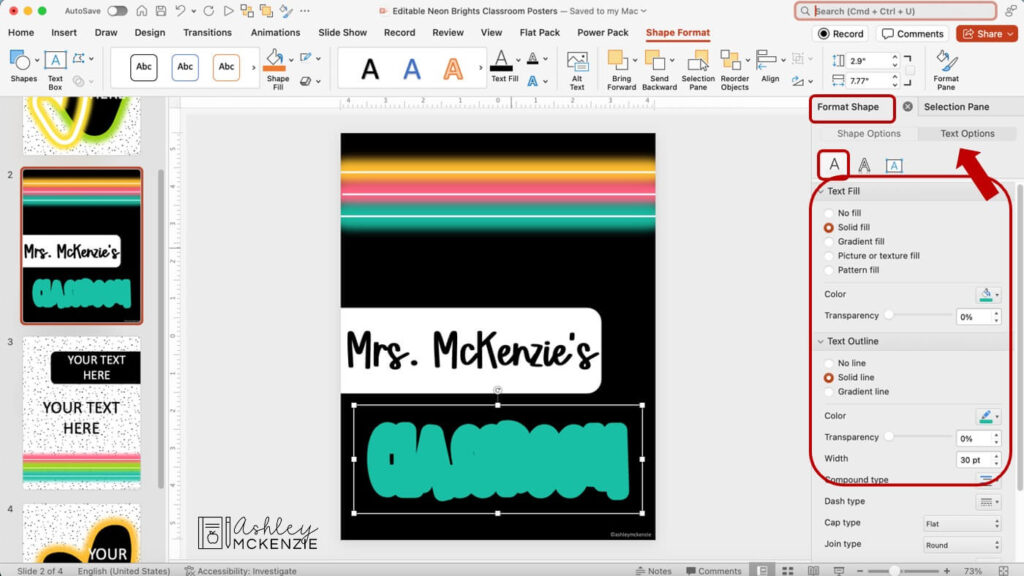
Step E: Add the Text Glow
Now we’ll add the glow as we did in Step 4 above. From the “Text Options” tab, select the middle “A,” which has an outline. New menu options appear. Select “Glow” to expand the glow settings. Choose the glow color – it should be the same color as the outline you added in Step D. Then adjust the size and transparency settings. In this example, and for many of the designs in my Neon Brights Decor Bundle, I used these settings: Size = 29 pt; Transparency = 39%. But you can try different values to see what you like best for your customizations!
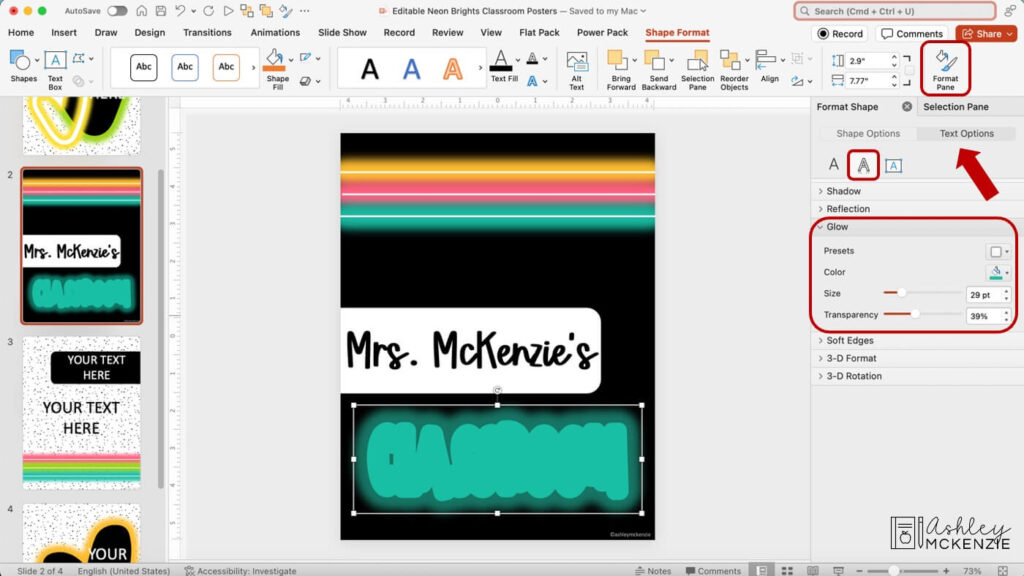
Step F: View All Layers and Overlap Text
Lastly, view the selection pane again to unhide the top text layer (if you hid it earlier). Simply click on the eye icon to unhide the layer. If needed, align your text box layers to make sure the top layer is directly overlapping the bottom layer.
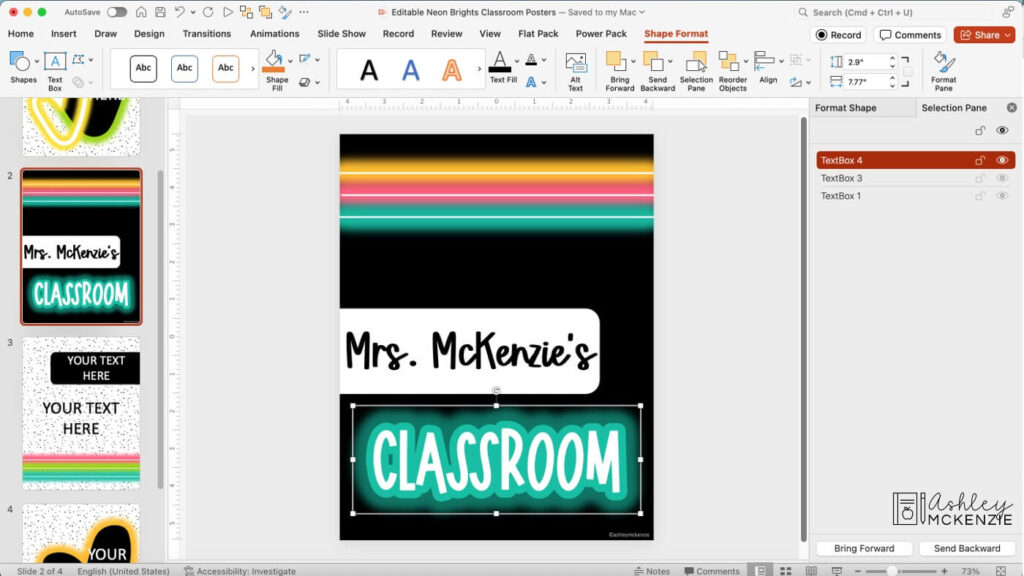
And there you have it – beautiful, glowing text!
More PowerPoint Tips for Teachers
For even more PowerPoint tips, please check out my tips for editing classroom decor. And you may also be interested in my step-by-step guide to layering text boxes for a bubbly letters look. It’s one of my favorite techniques to use when creating text that pops!
Make Text Glow in PowerPoint for Designs that Shine
I hope you love trying out these glowing text designs in the classroom decor you edit! It’s a great way to help the text pop! Have fun adjusting the settings to try out different looks. If you use this technique to make text glow in PowerPoint in the decor you edit, please share your photos with me on Instagram @ashleymckenzietpt. Happy editing!


